Monday, January 28, 2013

A little closer to finished...dream office update

After 2 weeks of working to create my dream office I am happy to say that I am 90% finished.  And...I could not be happier.  I finished assembling my Martha Stewart Craft furniture last week and finally got it organized and I am just waiting on one more piece of furniture and then....I am totally done.

Now of course it wouldn't be normal if I didn't make myself absolutely crazy in the process.  I have a knack for doing that to myself, but I'm glad that I did because my neurosis seems to have paid off :)   I had a vision in my head of exactly what I wanted this dream office to be and I clearly couldn't quit until I had it.

I have spent the last week shopping for the accessories and small details to make the space come together.  Here is the color scheme that I ended up going with...

Grey and white striped walls on 2 walls (which I shared a tutorial for HERE) and 2 solid grey walls at the opposite ends.

I kept my old office furniture which is a warm brownish grey color...you can see the  bookcase and desk that are super messy while I was painting, but you get the picture.

And I went with these pieces from Martha's line in white...


In case you don't have a clue...this is a thread holder for the wall.

So now I had grey, white, and the brownish furniture so I kept it simple with my accent pieces and colors.  Well, mostly that is.  I went into TJMaxx one day and fell in love with this.

It is grey and white and they had two of them, but I decided to only take one that day to try it out.  Big mistake.  I went back for the other one the following day and it was gone.  I was crushed.    I decided to use this one at my desk and then went on the neurotic hunt for another chair for my new craft table.

That's when I found her....yes HER because she is so pretty.  It is a distressed light wood finish with tan upholstery, but it totally compliments the table and walls.  And...it is the same exact chair as the zebra I showed you with a different finish and fabric.   I like the mix and match thing.

So again (remember I said I make myself crazy), I only took one home thinking I wouldn't want two exact same chairs at my craft table and then after I re-thought that....guess what?  You guessed it, the other one was gone when I went back.  I never learn.

The accent colors I am adding to the room to warm it up a bit are navy and gold...not metallic gold, more of a goldenrod.   As I mentioned in my last post, I have always had a love of golden colors from early on and had a yellow room as a little girl.  Navy to me is just such a great color and it works so well with so many other colors.  SO....to tie the two colors in a bit and add a little comfort, I made these two pillows for my new chairs.


Very simple, but just a touch of color and comfort too!

And what does this craft table I keep referring to look like you ask?   Well it's actually 2 of Martha's tables put together to allow me to not only have tons of space, but to have one side for sewing and one side for cutting.  I tend to take up a great deal of space when I'm working on a project.  Here are a few pictures....


It may be hard to tell in pictures, but it's HUGE and I adore that about it.   This side is for the sewing and I can fit both of my machines side by side at the table when I need to.

And the other side is for cutting as I mentioned earlier.  But...I had no seating as of a few days ago.  Remember my stupidity in never taking 2 chairs home.  Argh....silly me.   But, I found this the other day online at Home Decorators and I think it will be perfect.  


It's a warm grey rubbed wood with a cushion in a light greyish color.   I tend to prefer to stand when cutting even though my chiropractor husband gets mad, but it's easier for me.   So this bench can push right under the table or I can push it against the wall and add pillows so the kids can sit in my office with me to do crafts or homework. So excited to get it tomorrow!

It will go on the left side of the table.

Besides the yellow pillow, I found these great lamps and shades at Target that are perfect.  Truth be told, I actually bought the lamps before I even started painting.  Ha!  I loved the base with the glass stacked balls so much and then found the shades and was sold!  I have one of my desk and one on my craft table.   Other than these two lamps my office has high hat overhead lighting and I like to dim that and use the lamps.   It warms the room up so much.

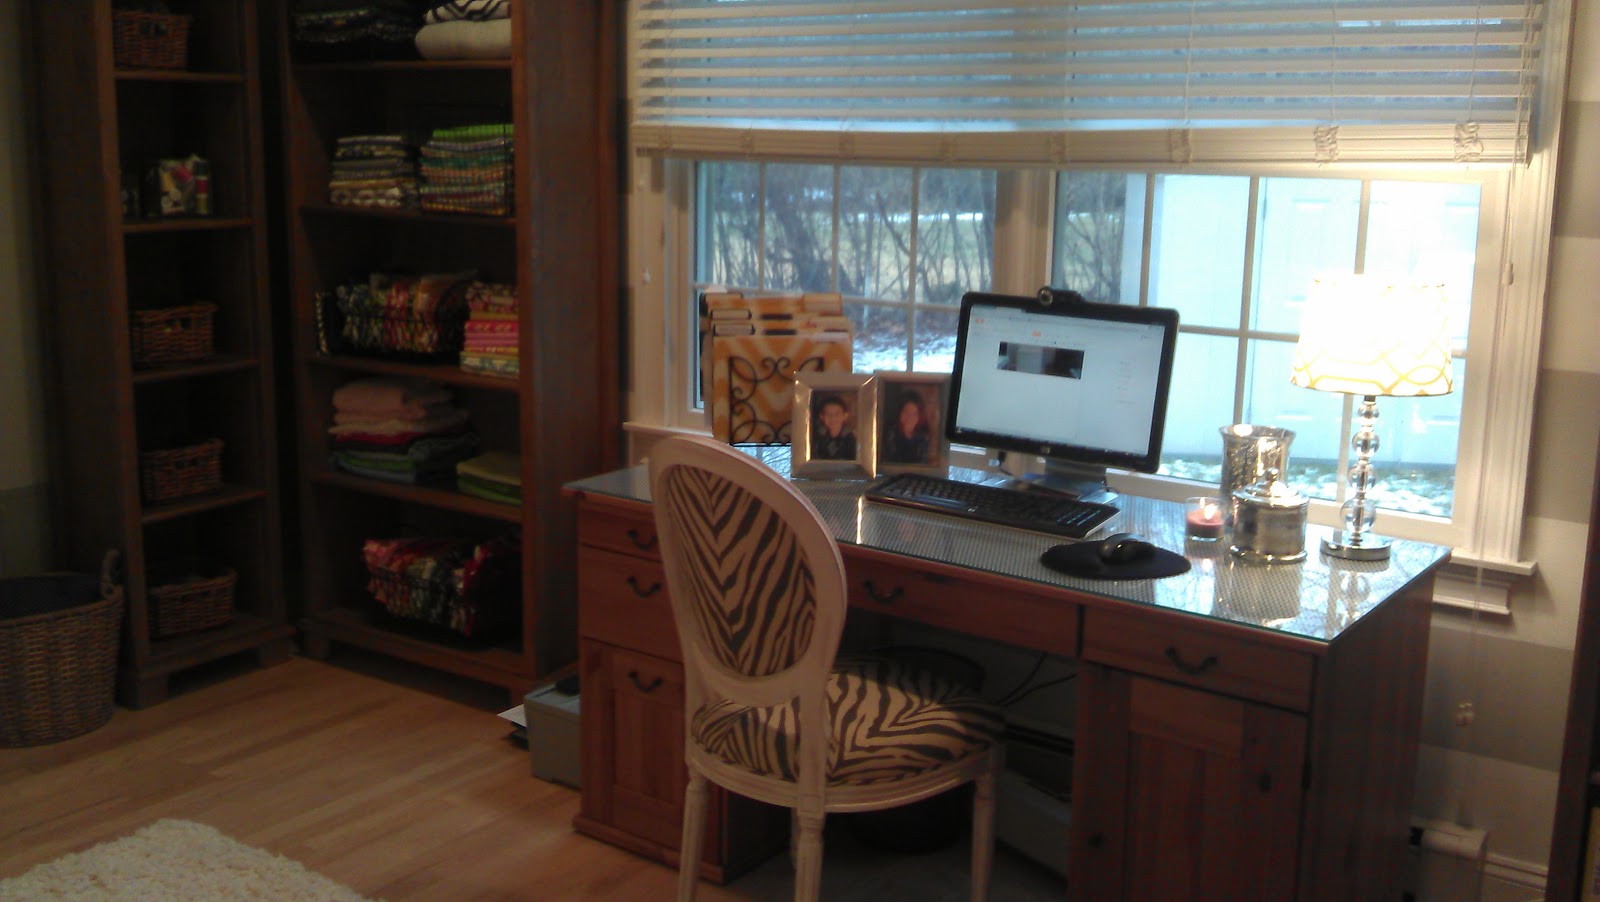
On to the desk.  As I mentioned, I am keeping my bookcases and desk from years ago that I got at Ikea.  I love both of them and they work perfectly in the room space wise, so they stay.  


I added some fun navy chevron fabric under the glass on my desk and added some mercury glass accessories and I am very happy with it.  I also ordered this mousepad in this pattern but with blue cursive writing.  The big black one I have now is just not working for me.


The desk sits right in front of the window so it's very peaceful.   I also found the PERFECT folders at Target to compliment my color scheme and I just need a warm day so I can spray paint the file holder silver.

For the floor I had originally bought this rug super cheap.

While I love it, it was just too much in the room.  So I went on a hunt and found this warm shag.  My kids are obsessed with it.  They come in multiple times a day to lay on it because it is so cozy.   Hopefully it will stay clean...lol

As for the other rug, it is now my inspiration to re-do my Master Bedroom.   

Here are the other pieces in the room starting with the Martha hutch.  It has sooo much storage space and I'm working on figuring out what I want in it versus in my closet.


I love the corkboard on the left side to hang pictures.
And there is a chalkboard on the other side which will soon have something on it too.

And the bookcases house fabric and the books.


On the top I added some great picture frames in gray and navy that I got at a local store.  I plan to add some additional paint to both of them.  


Here is what I am aiming for....I adore these, but didn't want to spend so much on them.

She is so incredibly talented, but out of my price range for my office re-do.

And here are a few panoramics of the finished product...or very close to finished.  Did I mention that I love it?

I need something fun for over the craft table, but I'm just not sure what yet.  


It is so my happy place now.   I'm working on a few more fun things to add and organizing the closet as well, but I'm so relieved that's it's almost done!!  I hope you enjoyed the "tour".

Poshed Up


Thursday, January 17, 2013

Office progress...

I know I promised some Operation Organization posts and I feel very remiss in doing so especially since I keep seeing not only other blogs doing so, but friends on Facebook who are full in organization mode.  I promise I have oodles of ideas to share, but .....I am still so on Cloud 9 about my office redo that I just can't focus on anything else.

As I mentioned in my last post HERE, I am in the process of creating my Dream Space as I have been calling it for my office.   The truth is that now that I have switched to the office away from the kitchen, I spend far less time in my office.  Figures.  But...I think when it's complete, I won't want to leave it EVER.

So far I have my walls completely painted.  YAY!  What a job it was, but I as so over the moon about the way it turned out.   So...I thought I'd share.   I know stripes are very "in" right now in decor and I was truthfully a little intimidated to try it, but I'm so happy that I did.  It has inspired me to take some more risks with color and design in other areas of our home.  For now though, it's all about my Dream Space.

Here is the before:  (somewhat before at least...I did not take a true before when it was my husband's office)

A powdery blue wall...of course this is after I spackled, taped and tested out the paint colors.


It was a complete disaster of furniture and other stuff from the office swap.

I was able to find some very helpful directions on how to measure, tape, etc. to do the stripes from "Classy Clutter" and I would highly recommend everything she mentioned.  I followed her directions exactly and had no bleeding issue with the stripes.

The first step was to paint then entire room my base color of grey which was Behr (Home Depot's) Paint and Primer in One in the color "Gentle Rain".   It's a soft grey and it's been easy to work with in terms of coordinating with my accent colors for the room.  The only problem I had was that the blue that was already on the walls was REALLY hard to cover.  

Here is the room after two coats of the grey on all of the walls.  They are not the best pictures because I took them at night.    


I let the entire room dry for one whole day prior to starting the stripes.  The very helpful and experienced salesperson in Home Depot told me to use Frog Tape to do my taping.  She assured me that not only would it stick well, but it would ABSOLUTELY prevent bleeding....and, she was 100% right!

So after 24 hours I started measuring and taping.   When I say that I followed the directions that I found, I literally measured my stripes the same amount too.    In order to make the stripes, you need a pencil, ruler (not measuring tape), your tape and a level and a credit card.   Yes, a credit card.

Here is the step by step:

1.   Start at the ceiling and measure down how far you'd like your stripes to be.  Mine are 9 inches each which allowed me to have a total of 5 grey and 5 white stripes on each wall.   

2.  Mark a small mark with your pencil at the 9 inch mark.

3.  Run your tape between each mark to create a straight line of tape on each wall.  I worked in somewhat small areas to give me more accuracy and then just had a little overlap between tape pieces.  If you do it this way it is important to just make sure that your overlap matches up perfectly.

4.  Double check with your level to make sure the tape is now level on the side that the paint will touch.  For instance, my first stripe from the ceiling is grey so my first stripe that I'm actually painting is white.   Therefore, my tape for that stripe sits within the grey area and the paint will only touch the bottom of the tape line.  Hope that makes sense.

5.  Use your credit card to smooth out the tape on the edge that will be a stripe.  There is no need to do it on  both sides since only one side of your tape will touch the paint and it makes it easier to remove.  That is unless you're a very messy painter.  

6.   I marked the tape so that I knew what I was painting which color.   A very valuable tip from "Classy Clutter" as well.


7.  Tape your corners off too if you are not doing all 4 walls so that you don't get your stripe color on the already painted walls.

So here is what one side of the room looked like before I started painting.  This is a somewhat small area to paint  because my double window takes up a large part of the wall. 


Once you are all taped make sure you RE-MEASURE.    You do not want to find out after you have started that you made a measuring mistake.   Now, you are ready to paint.

8.  The last great tip from "Classy Clutter" was to paint the edges where the tape sits first and then go back and paint the middle of the stripes.   I used a small foam roller around the edges and along the corner and then used a medium sized regular roller to roll the middle of each stripe. 

Here is that same wall after the stripes were painted.


I painted 2 coats with a half day of drying in between.  The key is to remove the tape on the stripes immediately after finishing painting.  DO NOT wait for the paint to dry.  My stripes were so crisp it was unbelievable.  I really think this has to do with the Frog Tape and the credit card step.   I found that the white  did not cover my grey enough after 2 coats and I went back and touched up with a 3rd coat in areas that needed it.

I also did the wall opposite this one.  So I have 2 solid and 2 striped walls.   This was a much bigger wall and job, but I am so happy with the results.  Here is the other side of the room.

Before Painting

After

Here you can see the contrast with the solid wall.

And around the doorway.

While this was a big job, I am so excited with the results.

I am working on finishing up putting together my new furniture and some other fun things in the room and hope to share the final room next week!

Poshed Up